|
Fallout 3 Walkthrough
Introduction
 Fallout
3 is, of course, the third in the series of these unique, post-apocalyptic RPGs. But whereas the first
two games were produced by Interplay and set in California, the third game is made by Bethesda Softworks
and takes place in a devestated Washington D.C. in the year 2277, 30 years after the events of Fallout 2.
It is also presented in mind-blowingly detailed 3D, while the first two, having been made 10 years ago,
were in 2D utilising a top-down isometric perspective. Fallout
3 is, of course, the third in the series of these unique, post-apocalyptic RPGs. But whereas the first
two games were produced by Interplay and set in California, the third game is made by Bethesda Softworks
and takes place in a devestated Washington D.C. in the year 2277, 30 years after the events of Fallout 2.
It is also presented in mind-blowingly detailed 3D, while the first two, having been made 10 years ago,
were in 2D utilising a top-down isometric perspective.
Fortunately, little has changed in the RPG mechanics for this new game, which is a good thing because
the S.P.E.C.I.A.L. primary stats system coupled with the Skills, Perks, and method of levelling up are the
things that make Fallout such a great role-playing experience. More about these in a while.
This guide is quest-oriented, though I've also written much about all the important objects and
people that you'll encounter in the various locales, even if they aren't related to completing a specific
quest. The quests in this game are referenced by the place where you obtain them. So if I, for instance,
mention Downtown Quest 1, you can get information on how to complete this quest by looking in the Downtown
section of the guide.
Note: this version of the guide should get you through the main quest in one piece, and also details quite
a few side quests. I need to make another pass or two through the game with different character types to document
more of the side quests. I thought it was more important to at least get something up in a timely manner.
Every other time I have documented an RPG the guide has been more or less complete, but months or even years
after the fact so that it was rarely useful for first time players.
Before we launch into the game proper, a few tips are in order.
Tips
Rather than wasting valuable Stimpaks to heal after a tough encounter, travel to some place with a
bed that you are allowed to sleep in.
You'll be finding lots of keys in this game. Doors that require a key will open for you automatically
once you approach them with the correct key. All your keys are kept in one place, the Keyring, which
can be accessed via your Pip-Boy 3000 in the Items > Misc section.
To holster your weapon, press and hold the R key. You run faster with your weapon holstered, and
it's also nicer to have a conversation with someone when you're not waving something nasty in their
face.
Explosives skill (30+) combined with Frag Grenades is handy for getting you out of tight spots
when you are outnumbered or outgunned.
Bottlecap Mines are one of the best weapons in the game with damage at 300+. Just drop one in a
doorway, then get an enemy to chase you through it and it's usually game over for them. Once you have
the schematics (which can be obtained via a quest early on in the game), these can be made with:
Lunchbox, Cherry Bomb, Sensor Module, and 10 Bottlecaps.
Fast travel on the World Map to locations you've already visited is really handy. You can't use
it when enemies are nearby, but you can usually manage to sneak to a safe spot from where this option
is possible.
If you tune into Galaxy News Radio via Data > Radio on your Pip-Boy, you'll hear all about your
own exploits as you complete major quests in the game.
You can become addicted to any of the chems such as Buffout, Jet, or Mentats if you take them too
often. If you want to stay 'in character' when you become addicted, you can be cured by a doctor (or
if you have a very high Medical skill, by yourself). Otherwise, just reload and chances are you won't
become addicted the next time you take the chem in question.
If you're into big guns like myself, the Flamer is one of the best weapons going. But always remember
to use it in V.A.T.S. mode when you can, or else you tend to hold down the trigger unnecessarily and
consume too much of that precious fuel.
At first, those hacking puzzles may seem like a fairly daunting guessing game. But of course, there's a
trick to solving them ;-) You just have to remember this rule: any word that does not have the same
number of letters in common with the number of letters you guessed correctly in the target word may be
eliminated. In other words, if you guessed 3 letters correctly, then any word that does not have
exactly 3 letters in common with the word you chose can be crossed out. It's a bit labourious, but the
first thing you have to do to use this approach is write down all the possible words on paper, because
you need to cross out words you have eliminated, and this is very hard to do mentally when there are like
20 words up there on the screen :- This concept is best illustrated by example, so suppose we are faced
with the following (theoretical) list of words:
BEAT
WELD
WEST
WEED
BEND
BEST
In this example, the correct password is BEAT, but we start out by guessing WELD. This guess only has
1 letter correct out of 4, so we can cross out any words that don't have exactly 1 letter in common with WELD
(I've put the number of letters in common in parentheses next to each word). So now our list looks like this:
BEAT (1)
WELD 1/4
WEST (2)
WEED (2)
BEND (2)
BEST (1)
And you have eliminated 4 out of the 6 possibilities in one shot. It nearly goes without saying that you
should save your game before attempting each hacking puzzle for the first time. You won't get the same words
again, but at least you get more than one crack at it if you make a mistake.
Well, that's probably enough already with the up-front tips. Time to dig in...
This early part of the game serves as a tutorial to let you get your bearings. But you also
choose your primary stats here (S.P.E.C.I.A.L), and tag your three favourite Skills.
Quests
- 1. Baby Steps - your S.P.E.C.I.A.L. stats.
As a toddler aged just 1 year, you get to select your primary stats from the book you find on the
floor outside your playpen. Choose wisely. The most important stats in my mind are Agility (more
Action Points in combat) and Intelligence (more Skill points to spend per level). I would crank
those up to at least 7 or 8, and leave the rest around 5. Above average Luck is also good for
getting a higher critical hit percentage in combat.
- 2. Growing Up Fast - Pip-Boy 3000.
At your 10th birthday party, you acquire the Pip-Boy 3000, which is essentially the game's interface.
You also have your first run-in with that bully Butch. After you've spoken with the requisite guests
at the party, Dad prompts you to head downstairs to the Reactor Level to meet Jonas. Use the BB Gun
to take out the three targets, then get the Radroach for 1 whole XP to boot.
- 3. Future Imperfect - Karma points and tagged Skills.
At age 16 on the way to take the G.O.A.T. test, you have your second encounter with Butch. This
one is all about saving Amata's honour. If you have high enough Speech skill, you can try to threaten
him with the "I'll tell the Overseer" ploy. But otherwise, this is also a good opportunity to become
acquainted with V.A.T.S. Just keep targeting Butch's head, and that should do it. You gain some Karma
either way. Then go take the G.O.A.T. and talk to the instructor afterwards. Not to worry, you can
override any choices the test made for you. In the end, you have tagged three Skills.
- 4. Escape! - 200 XP and Quest 5.
Amata wakes you up, and it seems your father has left the vault. They've killed Jonas. You'll need to
escape the vault yourself, via a secret tunnel in the Overseer's office. OK... important to maintain
your presence of mind here. Accept the 10mm Pistol from Amata. Pick up the Baseball Bat, a very useful
weapon at this stage whether you have poured any points into Melee or not. Also take the 10 Stimpaks
and Med-X from the medical cabinet there. Now venture out into the hallway, and take out the guard that
is pre-occupied with the Radroach using the Baseball Bat (remember to use V.A.T.S.). Then take his
armour and helmet and put them on. A little further up the hallway, Butch accosts you. He wants you to
save his mom from the Radroaches. Follow him to their quarters, open the door, and take out the three
Radroaches. You get some Karma points, and Butch gives you his Tunnel Snake Outfit as a reward (though
it is virtually useles. But it's the thought that counts). Make sure you scrounge all the weapons and
armour off anyone you kill from now on. You can barter the stuff later. Now head up to the Atrium.
The Overseer and Officer Mack are giving poor Amata a grilling there. Take out Officer Mack and make
sure to raid all the lockers here for weapons and ammo. You can kill the Overseer as well if you
like. You get a free pass into his office this way, and I wouldn't worry about Amata refusing to talk
to you because somehow I don't think we're ever coming back here again. If you don't take him out,
then you'll have to pick the lock to his office. No big deal. Use the terminal in the Overseer's office
to open the tunnel, then make your way out of the vault and into the Capital Wasteland. All of this
should result in you getting to Level 2.
- 5. Following in His Footsteps: Investigate the nearby town of Megaton for
information about Dad.
Once you have escaped the vault you pick up this quest, which I suppose is the central quest of the game.
You must find your father, and discover why he left the vault. See Megaton Quest 1 for details on how to
progress with this quest.
Head down the hill, and east towards Megaton (there's a mailbox on the way down the hill that contains
3 Frag Grenades, some Jet, and Psycho). Might I suggest a slight detour here before venturing
into Megaton? When you get to the sign for Megaton, hang a left instead. Be sure to enter the Small Ranch
House on your left and talk to Silver. You can get 300 caps off her if you promise to tell this chappie
Moriarty that she's disappeared once you get to Megaton. Anyway... enter the Springvale Elementary School.
Take out all the raiders in there, at ground, upper and basement levels. It's a bit tough going at this
stage in the game, but you can do it. You get a Springvale Library Key off one of the bodies (it opens a
door upstairs), and a Springvale Basement Key off another. You can go down to the basement and kill the
ants there for XP, but I never found a way to get to the 'vault' that was mentioned in the logs, even by
using all manner of explosives on various places in the basement. When you're finished here, head for
Megaton.
Talk to Lucas Simms, the sherriff. You get Quest 1 if you enquire about Dad, and also Quest 2 if you offer
to disarm the bomb at the town centre.
If you're nice to Gob, the ghoul in Moriarty's pub, you'll get better prices. Cheapest source of
Stimpaks in the game.
Talk to Doc Church in the clinic. If you have high enough Medical skill, you'll learn that Leo Stahl
has a Jet addiction. See Quest 4 below.
Talk to Moira in Craterside Supply, halfway up the hill. For starters, you can get a pretty useful
Armored Vault 101 Jumpsuit off her once she discovers you're from a vault. Then, offer to help her with
her book to get Quest 5 below.
Talk to Lucy West in Moriarty's Saloon to get Quest 7.
Speak to Walter at the water processing plant (up the ramp from Craterside Supply). If you can fix three
leaky pipes for him, you'll get 100 XP and 200 caps. You need a Repair skill of 30+ to pull this off. If you
scrounged a Vault 101 Utility Suit during your escape, that adds 5 points to Repair. Popping a Mentat also
helps. Anyway... the first leaky pipe is located right next to the Craterside Supply sign. Just hop over the
railing to access it. The second pipe is next to the steps on the hill leading out of Megaton. The third pipe
is next to the steps that lead up the hill from Mr. Burke's house. As an added bonus for completing this
unofficial quest, Walter will buy any Scrap Metal you bring him in future at an inflated price of 10 caps.
There's 300 caps in the Stahl's floor safe in the Brass Lantern if you can manage to hack it at night when
no one is around.
Jericho, an ex raider, hangs around Moriarty's Saloon. He will join your party, but only if you have
negative Karma.
Quests
- 1. Following in His Footsteps: Speak to Colin Moriarty about
Dad - Quest 3.
Talk to Lucas Simms and ask about Dad to get this quest. Moriarty's pub is up on the top of the hill to the
right from the entrance to Megaton (just up the path from Craterside Supply). Talk to Moriarty to discover that
your father and yourself weren't born in Vault 101. Unless you have very high Speech skill, it will cost you
100 caps to learn that Dad has gone to Galaxy News Radio in D.C. to seek out the DJ there named Three Dog (see
Quest 3 below). Optionally, you can lockpick the back door of the saloon, open the cabinet, and get Moriarty's
password to get this info, plus some dirt on the locals. But don't let Moriarty catch you at it or you'll lose
Karma.
- 2. The Power of the Atom: Disarm the Megaton bomb - 100 Caps and your very own house.
All you need to pull this one off is an Explosives skill of 25 (popping a Mentat to boost your Perception will help
if you're short of the 25 mark). As an additional reward, you get your own permanent dwelling in Megaton, just
above the Brass Lantern. Just be sure to save your game before going down into the pit to disarm the bomb, because
it's a radioactive area and you may need more than one attempt at it. Finishing off the Megaton bomb quest in this
manner is not without its drawbacks though. Because you have pissed off Mr. Burke, and ultimately his boss Mr.
Tenpenny, several groups of Talon mercenaries are dispatched on contracts in an effort to bump you off. They lurk
outside large buildings or metro stations that you have entered, waiting for you to emerge. However, you only have
to get through three waves of them before they give up. But be warned - they are tough in the early stages of the
game! One benefit of having to take them on is that they are wearing Talon Combat Armor, which I found to be some
of the best armour out there in the wasteland ;-)
- 3. Following in His Footsteps: Find Galaxy News Radio - 300 XP and Downtown Quest 1.
Once you've either spoken to Moriarty or hacked the terminal in his back room, you get a marker for Galaxy News Radio
put on your World Map. I'd wait until you're about Level 6 or 7 before trekking over there though. Downtown is full
of tough Super Mutants and other nasties. Anyway, once you do decide to take this on... keep to the north side of D.C.
Get to Friendship Heights, and enter the Tenleytown/Friendship metro station. Keep heading south. You come out at
Chevy Chase North station. Follow the Brotherhood of Steel to GNR, and help them take out the Super Mutant Behemoth
(then raid his corpse for stuff). Be sure to get the Fat Man and Mini Nukes off one of the dead Brotherhood of Steel
soldiers. Use the intercom to get into GNR. Go upstairs and speak to Three Dog to get Downtown Quest 1.
- 4. Leo Stahl's Jet addiction.
Leo can usually be found hanging around the Brass Lantern. I was never able to talk him out of his addiction using
Speech, but then I only had a skill level of 15 when I tried. You can agree to meet him at the water processing plant
(after dark), where he'll sell you Mentats.
- 5. Wasteland Survival Guide: Find food in the Super-Duper Mart - 3 Iguana Bits.
Might as well take this one on first. You can use the supplies and the XP. Moira puts the Super-Duper Mart on your
World Map. Travel to it, and wait for the commotion in the car park to subside before entering. Careful, the place
is infested with raiders. The food supplies are in a fridge in an open room to the right of the entrance. Moira
doesn't give you a whole lot for this, but at least you get to keep the food you scrounged.
- 6. Wasteland Survival Guide: Find medicine in the Super-Duper Mart - A Food Sanitizer.
The medical supplies are at the rear of the Super-Duper Mart, in a locked room. You can either hack the terminal, or
there's a Super-Duper Mart Pharmacy Key (not to mention 2 Bottlecap Mines :-) in a room all the way at the back. In
addition to the medical supplies you find in the cabinet, there's also a Mini Nuke and 4 Frag Grenades. Beware that
once you are amongst the medical supplies, a new batch of raiders enters the store, blocking your way to the exit.
You can activate the security bot to cause a bit of havoc, but I found you can also sneak past them by going to the
left and hugging the wall until you reach the place where the food supplies were. You can hop over the counter there
and beat it to the nearest exit. As a reward, you get to keep all the chems you found, plus Moira gives you a Food
Sanitizer (minimises the bad side effects of food). Offer to contract radiation sickness next, Quest 8.
- 7. Blood Ties: Deliver Lucy's Message - Arefu Quest 1.
Talk to Lucy West in Moriarty's Saloon, and offer to deliver a message to her family in Arefu (which she puts on your
World Map). The few trailers that make up the village of Arefu are located on a broken overpass that extends over
what's left of the river there. When you arrive, speak to Evan King. He wants you to check out the trailers. Investigation
reveals that the Wests have been murdered (with Medical skill of at least 30, you can determine that the blood has been
drained from their bodies). Their son Ian is missing. Speak further with Evan King to get Arefu Quest 1 below.
- 8. Wasteland Survival Guide: Contract more severe radiation sickness (600 rads) - Rad Regeneration
Perk, some Rad-X and RadAway.
Go for the whole hog, 600 rads. Just stand in the pit near the Megaton bomb until your rad meter on the top right of the
screen goes over the 600/1000 mark. Moira cures you when you return to her, and you also get 3 Rad-X, a RadAway, and a
unique Perk: Rad Regeneration. This allows you to heal a crippled limb, but only if you get enough rads first...
- 9. Wasteland Survival Guide: Travel to the playground in Minefield - 100 XP, 3 Frag Grenades,
3 Stimpaks, and Bottlecap Mine Schematics.
Agree to travel to the town of Minefield to further Moira's research. Once there, disarm as many mines as you can and
take them with you. There is a nutcase named Arkansas with a Sniper Rifle in the destroyed tower in the centre of town.
Might as well take him out and get his weapon as it's obviously the best long range gun in the game. Use the key you find
on him to enter the Zane house, at the end of the road. Some Stimpaks in there, and beds you can sleep in if you don't mind
sharing them with the former inhabitants :-
- 10. Wasteland Survival Guide: Test the repellent on 3 Mole Rats (10 for bonus points) - Repellent Stick
and 2 Jet.
After you've completed the three quests for Chapter 1 of Moira's guide, you can start working on Chapter 2. I'd take this one
first. Moira puts the Tepid Sewers on your World Map. Careful, because in addition to the Molerats there's an automated
turret down there, plus a madman with a gun. When you complete the quest, Moira lets you keep the Repellent stick, which is
real handy for taking out Molerats.
- 11. Wasteland Survival Guide: Place the observer in a spawning pod in the Anchorage War Memorial - 2
Stealth Boys.
Moira gives you an Observer to plant, and puts the Anchorage War Memorial on your World Map. I tried a few times, but couldn't
even get past the first room. Sneaking deep into a Mirelurk lair without killing any of them? You'd need a maxed out Sneak
skill plus tons of patience. If you do manage to do this quest, you get 2 Stealth Boys as a reward. But there are other ways
you can obtain these a lot easier.
- 12. Wasteland Survival Guide: Become seriously injured (50% health or less) - 2 Med-X and Environment
Suit.
Just go outside and drop a Frag Grenade or two right at your feet. That should get you under 50% health, and cripple a limb.
Return to Moira then to get stitched up and collect your reward. If you can remember to wear the Environment Suit whenever you
are using Stimpaks, you will gain more HP.
- 13. The Power of the Atom: Rig the Megaton atomic bomb to explode - 300 XP, 500 caps, and your own
penthouse suite in Tenpenny Tower.
Speak to Mr. Burke in Moriarty's Saloon, and accept the Fusion Pulse Charge from him. Obviously, you would want to complete
all other Megaton related quests before taking this one. And... it's not gonna do your Karma a whole lot of good either.
Then go down into the pit and use the Fusion Pulse Charge to arm the bomb. Now you have a rather long trek to Tenpenny Tower
on the SW of your World Map. Mention Mr. Burke's name to gain entrance, then take the elevator to the penthouse suites. Mr.
Burke and Mr. Tenpenny are waiting for you out on the balcony. Use the detonator to set off the Megaton bomb and then watch
the ensuing pyrotechnic display. You've lost a whole ton of Karma, but I suppose you realised that already. As compensation,
you've earned 500 caps and now have a base of operations in one of the Tenpenny Tower penthouse suites. There are a few quests
you can obtain here, documented in the Tenpenny Tower section below.
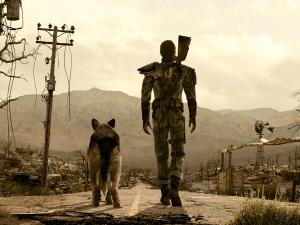
In a place called Scrapyard, just south of Minefield, you can acquire a canine companion called Dogmeat if you save him
from some raiders. Those of you who are familiar with the Fallout mythos will recall that Dogmeat's ancestor was
a handy party member in the first game. Well... he's pretty handy in a fight here too, but difficult to keep alive once
you start tangling with Super Mutants and the like. However, whenever his health gets low, you get a dialogue option to top
him up with a Stimpak. I managed to keep him alive for most of the game, and he's very good at holding enemies at bay while
you pick them off using V.A.T.S.
You obtain the following quest by speaking to Lucy West in Moriarty's Saloon, Megaton. Then after you arrive at Arefu, check
out the trailers for Evan King and report back to him.
Quests
- 1. Blood Ties: Locate the Family - 300 XP and Shishkebab Schematics.
King suggests three places where the Family may be hiding out: Moonbeam Outdoor Cinema, Hamilton's Hideaway, and Northwest
Seneca Station. There's nothing at the Cinema. Hamilton's Hideaway (a cave set into the cliff just below a beached boat)
contains a few Radscorpions, a Raider with a Combat Shotgun, and some useful supplies including Cherry Bombs; but alas, no
sign of the Family. There's also a locked cell in there, but I searched everywhere for the key and coudn't find it.
Go to Northwest Seneca Station, and talk to the Ghoul named Murphy. He will give you money for Sugar Bombs. There
is a tunnel in one of his back rooms that leads to where the Family are located (Meresti Trainyard). Beware, the way there
contains Mirelurks, and is heavily trapped. The Family is holed up in the first tunnel off to the north. Don't shoot! Just
walk up to Robert and speak with him (be sure to mention the letter from Lucy West), then go talk to Vance in the upstairs
area of the station. You can convince him to let you see Ian, once you talk to several of the Family members to learn that
they are vampires rather than cannibals (as you thought at first). The key to getting Ian to leave the Family is to reason
with him gently, then show him Lucy's letter once that option presents itself. Make a pact with Vance for the Family to
protect Arefu in exchange for them donating blood packs. As a reward for being so civil and patching things up, Vance gives
you the schematics for a Shishkebab - a handy melee weapon. Now go speak with Evan King to complete the quest and get the XP.
You can sleep in the West's beds now, and if you speak with Karen Schenzy, she puts five new locations on your World Map:
Dickerson Tabernacle Chapel, Shalebridge, Five Axles Rest Stop, Rockbreaker's Last Gas, and Fort Bannister.
You arrive here after arming the bomb in Megaton. It's unlikely you would just stumble upon the place in your travels, as
Tenpenny Tower is located in the extreme SW on your World Map. The place is inhabited by what's left of the idle, stuck-up
rich. All the suites in the tower are open, so you can just walk in and strike up a conversation with whomever you like at
any time.
Talk the the head of security, Chief Gustavo, to get Quest 1. He hangs out in the lobby. By the way, he has some really
good armaments for sale.
Quests
- 1. Tenpenny Tower: Kill Roy Phillips and his followers - 300 XP and 700 caps,
plus Chinese Assault Rifle.
Speak to Chief Gustavo, and offer to solve his Ghoul problem. He offers 500 caps, but you should be able to talk him into an
extra 200 caps, and then he also throws in an excellent weapon: a Chinese Assault Rifle. The Ghouls are holed up in the metro
tunnels beneath Warrington Station, just to the west of Tenpenny Tower. Use the metal door there to access the tunnels. You
have to travel a fair bit through the tunnels and take on quite a few Feral Ghouls before you get to Warrington Station. Roy
and his fellow non-feral Ghouls are holed up there. Talk to Michael Masters, and tell him you wish to speak to Roy Phillips.
Roy can be found through the gate under the stairs, and down the tunnel a ways. He wants you to open a door in the basement
of Tenpenny Tower so the Ghouls can get access and storm the place. So now there are three ways you can complete this quest:
- Kill Roy Philips and all his followers.
- Open the door in the basement of Tenpenny Tower to allow the Ghouls to gain access.
- Talk Allistair Tenpenny into allowing the Ghouls to peacefully enter the Tower.
If you want to go for the peaceful solution to this quest... after speaking to Roy Phillips, go talk to Allistair
Tenpenny. He'll let the Ghouls into the tower if you can convince the following residents that it is a good idea:
- Mr. and Mrs. Wellington. Wellington says the only way this will happen is over his dead body, so... find the Love Letter from
Edgar Wellington II to another of the residents named Susan. Just show the letter to Millicent Wellington, and she promptly pulls
out a gun and shoots her wayward husband. That's them out of the way ;-)
- Mr. Ling. Runs the New Urban Apparel shop. No dice from him on the 'Ghouls living here' score.
- Ms. Montenegro. She hangs out in the boutique. You'll need a very high Speech skill to convince her to let the Ghouls live
there.
- Ms. Lancaster. If you wait a few hours after Millicent Wellington kills her husband, she also conveniently bumps off Ms.
Lancaster, who was the Susan referred to in the Love Letter.
I had no luck convincing the remaining two residents that the Ghouls should be allowed to live in the Tower. But my Speech skill
was very low (at the 15% mark), so I was only getting a 9% chance to convince them. My guess is that you could only pull this off
with a Speech skill of 70% or higher, and a lot of saving just before conversations.
Alternatively, if you want to get access to the basement to let the Ghouls in, speak to Irving Cheng about it. He recommends that
you seek out a chap named Dashwood. Sure enough, Herbert "Daring" Dashwood can be found on the second floor of suites, and it's
easy enough to talk him into letting you borrow the key to the basement. Then just go outside and around the back of the Tower to
get into the basement. Hack the terminal there to let the Ghouls in. Then meet Roy out front, and he gives you a Ghoul Mask as a
disguise to ward off Feral Ghouls. You still get 300 XP for completing the quest this way, but you lose a lot of Karma (and of course,
you can't collect the 500 Caps from Gustavo). After destroying Megaton, completing this quest by letting the Ghouls into the Tower
took my Karma all the way down to Very Evil :- Well... the pickin's are quite good back in the Tower once you manage to fend off the
Feral Ghoul Roamers and Glowing Ones. Doc Banfield has 20 Stimpaks in his safe, and there are a lot of caps and other assorted goodies
on the dead residents and in their safes. Also be sure to raid the Armaments Locker outside with the key you get off Gustavo's body.
Big Town is located near the river, directly to the north of Vault 101. You might stumble upon it on your way up to Arefu. Ironically,
it's inhabited mostly by, well, little people. Talk to them to learn that some of their brethren have been kidnapped and are being
held by Super Mutants. See Quest 1 below.
Quests
- 1. Big trouble in Big Town: Rescue the Big Town captives from the Super Mutants - 300 XP.
By speaking to the Big Town residents, you learn that a few of them have been captured by Super Mutants and are being held in
Germantown Police Headquarters, which now appears on your World Map. Beware that you'll need to take out about a half dozen Super
Mutants in order to complete this quest, so you'd need to be at least Level 5. You can get into the police HQ via a set of stairs in
the back that lead to the top floor. A fella named Shorty is being held in the basement, and Red is in a cell on the ground floor.
You can get the key to the cell off the body of the Super Mutant on that floor. When you return with Shorty and Red to Big Town, you
get the XP and an unofficial quest to stick around for a bit and protect them from further Super Mutant atttacks. If you agree to help,
then sure enough, you can knock off the 4 Super Mutants that arrive in a few minutes time for the XP.
Careful, the place is crawling with Talon Company Mercs, and one of them in a tower at the back has a Missile Launcher. Good source of
Talon Combat Armor and other supplies if you can manage to bump them all off. You can also enter the fort proper where there are yet
more Mercs and supplies, especially some Stealth Boys in safes (Locked, Average) upstairs.
Talk to the DJ at Galaxy News Radio, Three Dog, to get Quest 1 below.
Quests
- 1. Galaxy News Radio: Find the Museum of Technology and Retrieve the Communications Relay
Dish - Communications Relay Dish and Quest 2.
Galaxy News Radio needs better range in order for Three Dog's message, Fighting The Good Fight, to be heard all around the Capital
Wasteland. His dish atop the Washington Momument has been wrecked, and he needs you to replace it. So... he's heard of a possible
replacement in the form of a dish that's kept in one of the exhibits at the Museum of Technology, which of course promptly gets onto
your World Map. You can get there by taking the rear exit from GNR, then heading right to enter the Collapsed Car Tunnel that leads
to Dupont Station. From there, defeat the raiders in the tunnels (you can hack a terminal to disable 2 turrets where they are camped out),
and then keep heading south through the tunnels until you get to Museum Station. Unfortunately, the arrow on the World Map doesn't
reflect your progress through the tunnels. But just keep heading roughly SE according to your compass and you'll eventually arrive at
Museum Station (use the Brotherhood of Steel symbols painted on the walls to guide you into the station).
Exit Museum Station on the east side, and the Mueseum of Technology is just there to your right. Take out the 2 Super Mutants in the
atrium, then head upstairs (make sure you take the 2 Stealth Boys from the blocked-off hallway there), go through the vault tour, and
then enter the west wing and head downstairs to the planetarium. The terminal in a utility room opens the planetarium exit on the far
side. Go down the hallway and be prepared before you open the door at the end. There's a tough Super Mutant Brute in there. Once you take
him and his buddy out, you can grab the Virgo II Dish from the exhibit to complete this quest. You now have Quest 2.
- 2. Galaxy News Radio: Find the Washington Monument and Repair the Damaged Radio Relay - 400 XP and Quest 3.
You can get to the Washington Monument by just hanging a left when you exit the Museum of Technology, but there are a lot of Super Mutants
blocking the way. So I found it best to go back into Museum Station instead, and take the west-side exit out. Use the terminal at the
entrance of the Monument to gain access (you somehow know the password... or perhaps the Brotherhood of Steel guards there gave it to
you)? Once inside the Monument, take the elevator to the top and activate the control panel there to install the new dish. Return to GNR
and speak with Three Dog to get Quest 3.
- 3. Scientific Pursuits: Gain entrance to Rivet City - Rivet City Quest 1.
After you've installed the new dish in the Washington Monument, speak to Three Dog and he will tell you where Dad has gone: Rivet City. If it's
not already on your World Map, Three Dog puts it there. And you also get a photo of a person you need to find there who knows where Dad is,
one Doctor Li. I found that the easiest way to get to Rivet City was by hugging the river bank and heading SE. As you get closer to Rivet
City though, you'll encounter a lot of Super Mutants. You may want to expend one of those Stealth Boys you've been carrying around for the
whole game to complete the last part of the journey without being harrassed. Once you arrive at Rivet City, use the intercom at the top of
the stairs opposite the ship. Cross the walkway once they swing it over, then mention Doctor Li to the guard. You'll probably also have to
mention Dad. That should do it. Then see Rivet City section below.
At first I thought it was a brothel, but Dukov is really just an old lecher who offers protection for these girls so they can permanently...
party. At least I think that's what the setup there is. Anyway, it's located just to the SE of the Tepid Sewers entrance. If you hang around
a while till one of Dukov's heavies, a Wastelander, appears at the entrance (this might only happen if you're playing a male character), he'll
put Rock Creek Caverns on your map (NE of Friendship Heights metro station). A lot of Deathclaws there, if you're in need of XP.
Once you get past the guards at the entrance, you need to find Doctor Li in the Science Lab. Instead of entering the door for the market, take
the stairwell entrance on the left. Follow the signs to the Science Lab to get Quest 1 below.
Thee's a workbench in the Market that you can use to build your custom items.
Quests
- 1. Scientific Pursuits: Look for Dad in Project Purity's Control Room - Info concerning Dad's
latest whereabouts.
Speak to Doctor Li to get this quest. She'll tell you that the last time she spoke with your father he was headed for Project Purity, which
is located in the Jefferson Memorial, just to the west of Rivet City. The easiest way in is to go around the west side and enter via the Gift
Shop. You need to find and listen to as many of the holotapes Dad left behind as you can. The key one (Tape No. 10) is located in the Project
Purity control room (in the Rotunda), on top of a console. It implies that Dad has gone to Vault 112 in search of some vital technology, and
this location now appears on your World Map. See Jefferson Memorial Quest 1 below.
- 2. The Replicated Man: Continue to search for clues to the android's identity OR tell Zimmer he's dead - 300 XP.
Speak to Dr. Zimmer in the Science Lab to get this quest. It would seem that his prized android, A3-21, has escaped. This is not a surprising
thing after all, as the more you speak with Dr. Zimmer... the more you get the idea that he seems to be the kind of person who could even bore
an android to death. Well, there was no difficult decison to make in my mind regarding this one. Zimmer is a complete berk. So... you should
bump into Victoria Watts somewhere in your travels around Rivet City. She's a member of a group that call themselves 'The Railroad', and their
mission is to hide escaped androids (along the same lines as the Underground Railroad that helped escaped slaves during the U.S. civil war).
She'll give you an authentic part from the android, and ask you to give it to Zimmer to convince him that the android he is searching for is
dead. Showing Zimmer the part doesn't get you much in the way of a reward, but it completes the quest and does wonders for your Karma!
- 3. Stealing Independence: Retrieve the Declaration of Independence from the National Archives - 300 XP, 500 caps, and
Railway Rifle Schematics.
In the Midships Deck, you should run into Abraham Washington and his collection of memorabilia. He'd like you to retrieve the Declaration of
Independence from the National Archives to... round out his collection. The National Archives is crawling with Super Mutants like most
places in D.C. are, but this place is so thick with them it's like a Super Mutant factory! Be sure to enlist the aid of Sydney, a merc who is
holding off the Super Mutants as you arrive in the lobby. As a return for her services, she wants half a share in the profits you get for
retrieving the Declaration of Independence. I'd accept the offer, because she's pretty handy with that custom-made SMG of hers. As it turned out,
Sydney was killed in the sub-basement anyway, so I didn't have to pay her cut in the end. Your mileage may vary.
Make sure you have a lot of Stimpaks on you, and some Pulse Grenades/Mines will really help with the tough bots you encounter in the
Archival Secure West Wing. You can take an elevator from the basement all the way to the bottom, but I preferred to explore a bit. For instance,
I also found the Bill of Rights and some Stealth Boys in a (Locked, Hard) room in the West Wing. Once you've gone as far down as you can
go and reach the Archival Strongroom, a Protectron (with a barrister's wig, no less!) named Button Gwinnett has the password to the terminal that
unlocks the room where the Declaration of Independence is kept. Return to Abraham Washington in Rivet City to collect your reward. You get 400
caps for the Declaration of Independence, and you can get a further 100 caps for the Bill of Rights. He also gave me schematics for a unique
weapon: the Railway Rifle, which puts all those Railway Spikes you've been finding to good use ;-)
- 4. The Waters of Life: Join the scientists at Project Purity - Jefferson Memorial Quest 2.
You need to complete Vault 112 Quest 2 in order to get this quest. Then follow Dad and the other scientists over to the Jefferson Memorial/Project
Purity. There's potentially a spot of bother here. If you didn't completely clear the Jefferson Memorial of Super Mutants the first time you
visited, you have to do so now to make it safe for your Dad and the scientists to enter (in fact, the game told me that 'Dad is unconscious' when
I entered the Memorial with Super Mutants still in there. Scared the hell out of me at first because I thought I might have to play half the game
over again. But no, once I got them all, I just walked outside and Dad was there with the other scientists waiting to come in. Phew).
Once the place is clear of Super Mutants and the scientists agree to follow you in, make your way to the Rotunda and wait for Dad to show up,
then speak with him and ask him what needs to be done. Then see Jefferson Memorial Quest 2.
Also the location of Project Purity, just west of Rivet City. This is where your Dad spends all his quality time... at least he did before you
were born.
Quests
- 1. Scientific Pursuits: Gain access to Vault 112 - Closer to finding Dad.
When you locate and listen to holotape no. 10, it gives the location of Vault 112. See section on Vault 112 below for details on how to proceed.
- 2. The Waters of Life: Turn on the Flood Control Pump power - Quest 3.
Once you have escorted Dad and the other scientists safely inside the Jefferson Memorial, speak to Dad in the Rotunda to get this quest. You need to
turn on the Flood Control Pump power to gain access to the room containing the mainframe. Head down into the basement and follow the signs that
lead to the Flood Control room, then hit the switch on the wall there to activate the pump. Easy one. Return to Dad and ask him about fuses to
get Quest 3.
- 3. The Waters of Life: Replace the damaged fuses - Quest 4.
The flood waters have shorted out some of the doors, most notably the one that gives access to the mainframe. Dad gives you three fuses. Head back
to the basement again, and follow the signs to Fuse Access A1. Activate the Auxiliary Power Fuse Box there to use the fuses that Dad gave you. Quest
4 next...
- 4. The Waters of Life: Boot up the mainframe - Quest 5.
From the fuse panel, head back up a level to the doors that give access to the mainframe. You can enter now. Activate the Mainframe Power Switch, then
speak with Dad on the intercom there to get Quest 5.
- 5. The Waters of Life: Drain the intake pipes - Quest 6.
Now you need to drain the intake pipes (*sigh* why did they wait until this far into the game to hit you with the Fed-Ex quests?). There's a Grate to
Pump Control in the hallway directly across from the Gift Shop entrance to the Memorial. Head all the way down to the end, and Activate Pump Control.
This triggers an event whereby the Enclave (your nemesis from Fallout 2) arrives in force :- Make your way back to the Rotunda via the now unlocked
Grate to Sift Pump (another good time to make use of a Stealth Boy, as the place is filling up with Enclave soldiers), only to see poor Dad take his
own life rather than turn control of the project over to the Enclave. Quickly, follow Doctor Li out of the Rotunda, and escort her into the Taft
Tunnels via a manhole cover not far from the Rotunda door. Once you are safely into the Taft Tunnels with Doctor Li and the other scientists, you get
Quest 6.
- 6. The Waters of Life: Escort Doctor Li to the evacuation point - 700 XP.
Technically, in order to complete this quest, you only have to get Doctor Li safely to the other end of the tunnels. The other scientists are
'expendable'. Talk to Doctor Li and suggest that the scientists wait here while you scout ahead. They won't wait for you long enough so that you can
reach the other end of the tunnels anyway, but they'll at least wait pretty far behind so that you can clear the tunnels of vermin before they catch
up with you. During the journey, Garza requires Stimpaks to help with his heart condition. Some extra Karma points for you if you agree to part with 5
Stimpaks for this purpose. Once you reach the Brotherhood of Steel guards, you're relatively safe. Though... wait for a last-ditch attack on the guard
outpost by some Ghouls to dissapate before you go fetch the scientists. Then head up to the surface for the XP. Doctor Li takes over once you get back
outside. Then follow her inside the Brotherhood of Steel Citadel once she gets Lyons to open the gate. See section on The Citadel below.
Access to Vault 112 is via Smith Casey's Garage, in the middle of nowhere. I found it safest to sneak up to the garage from the south, as there are no
Protectrons in this area. Enter the garage through a door on the west side. Activate switch on wall to open the metal doors in the garage floor.
There's a (Locked, Hard) terminal down in the large room where the vault residents are (they're all in suspension in 'Tranquility Loungers')
that grants access to a room full of aid. In addition to an assortment of weapons and chems, you also get the password to the Overseer's Office.
But the only thing in there, aside from Dr. Braun in his Tranquility Lounger, is a (Locked, Easy) wall safe with not much in it.
One of the Robobrains will issue you a Vault 112 Jumpsuit if you don't already have a vault suit on you. Then just find the empty Tranquility
Lounger in the large room at the bottom of the vault, and hop inside to visit... Tranquility Lane. See Quest 1.
Quests
- 1. Tranquility Lane: Exit Tranquility Lane: - 600 XP and Quest 2.
At first I thought this was a trap, and in a way it is, but there *is* a way out of the simulation. Also, exiting the simulation is the only way you
can be re-united with Dad. If you haven't already figured it out, 'Betty' is actually Dr. Braun, the Vault 112 Overseer, from whom Dad was looking
to obtain essential technology for Project Purity. But now Braun is all wrapped up in his own simulation. Talking to most of the residents here
doesn't get you very far, but... if you speak with Old Lady Dithers, she has also figured out that this is a simulation, and that Dr. Braun is
manipulating it. She recommends that you check out an abandoned house.
Sure enough, the Abandoned House is unlike the others, and there are some mighty curious objects in the sitting room. You'll notice that if you
interact with most of the objects there, you get a tone followed quickly by a nasty double-beep. But if you interact with the Broken Radio, it
just produces a tone. Have you figured it out yet? Right. The trick is to interact with the objects in a certain order, to keep producing tones
instead of the dreaded double-beep (which of course indicates that you must start the sequence again from the beginning). It's Dr. Braun's 'password'
inside this simulation. The correct order is: Broken Radio, Glass Pitcher, Garden Gnome, Glass Pitcher, Cinder Block, Garden Gnome, Empty Bottle.
And now the Failsafe Terminal appears in the room! Access "Chinese Invasion" program, then activate it. That does it. Unfortunately, all the vault
residents aside from Dr. Braun die because of this, but it was your only way out. Near Betty/Dr. Braun is a virtual door that is your way out of
here. Be sure to talk to Dr. Braun on the way out. He is trapped here forever. Your Dad turns out to be the dog, Doc. And the G.E.C.K. is real.
Exit through the virtual door, and Dad walks up to your Tranquility Lounger. 600 XP for completing this quest. And now is as good a time as any to
have a chat with Dad, to get filled in on Project Purity. Then agree to follow him back to Rivet City. See Quest 2.
- 2. The Waters of Life: Go to the Rivet City Science Lab - Rivet City Quest 4.
Just head back to Rivet City, and go to the Science Lab. Dad enters into a heated discussion with Doctor Li. Hmm. It seems that we need to locate a
G.E.C.K. for Project Purity. Speak with Dad then, and agree to head back over to Project Purity with himself and the other scientists. See Rivet City
Quest 4.
This is the Brotherhood of Steel headquarters in the Capital Wasteland. Speak to Elder Lyons once Doctor Li is finished speaking to him. He agrees to
let you have Power Armor training. He says you should speak to Gunny. You'll find Gunny near the Great Hall in area A, but you may have to wait a
while for him to show up there. Personally, I think Power Armor is overrated. It cuts your Agility by 2 thus reducing your effectiveness in V.A.T.S,
and it doesn't really afford a whole lot more protection than, say, Recon Armor or Talon Combat Armor.
You start with Quest 1 here.
Talk to Scribe Jameson in the Archives. She'll give you 100 caps for the Holotag you can get off each fallen Brotherhood of Steel paladin.
The Armory (on the ground floor of the Lab) won't trade with you unless you talk to Elder Lyons first to get permission. They have some pretty good
stuff, but it ain't cheap.
Quests
- 1. Picking up the Trail: Ask Scribe Rothchild for pre-war computer access - Quest 2.
Well, we need to find a G.E.C.K. Scribe Rothchild in the Lab puts you onto the track of finding a computer in the Archives that my help you locate a
G.E.C.K. Use the Vault-Tec terminal in the Archives to discover that Vault 87 was issued a G.E.C.K. Then talk to Scribe Rothchild again to learn the
location of Vault 87 (he shows you a big screen with all known vault locations in the D.C. area. Maybe you could take a screenshot of this and use
it to find some of the other vaults ;-) Anyway, you now have Quest 2.
- 2. Picking up the Trail: Search Lamplight Caverns for a way into Vault 87.
See Lamplight Caverns section below.
The Lamplight Caverns entrance is next to a small shack all the way on the west side of your World Map. Speak to Mayor MacCready, and you may be able
to talk your way into Little Lamplight if you have enough Speech/Charisma. If not, then I'm afraid you'll have to undertake Quest 1. Once you get past
MacCready, you obtain Quest 2.
Quests
- 1. Rescue from Paradise: Escort the children out of Paradise Falls - 900 XP, and entrance to Little
Lamplight.
Some of the Little Lamplight residents have been kidnapped by slavers. MacCready puts Paradise Falls, a place pretty far to the NE of here, on your
World Map. You'll need to talk your way past Grouse at the entrance, then speak to Eulogy. He's asking 2000 caps for the three kidnapped Little
Lamplighters, but with a bit of Speech/Charisma you can talk him down to 1200. Of course... you can also just wipe out all the slavers ;-)
- 2. Picking up the trail: Enter Vault 87 - 800 XP.
If you have Science skill of 50+, you can seek out Joseph in the Great Chamber (follow 'Spelunkers/Great Chamber' signs). He'll turn the power on
for a terminal (Locked, Average) that once hacked, gets you into vault 87 the back way. Otherwise... you'll have to go in the hard way via Murder
Pass. Quite a few Super Mutants to get by there. In either case, see section on Vault 87 next.
Quest 1 is really the only thing that matters here.
Quests
- 1. Finding the Garden of Eden: Retrieve the G.E.C.K. - 1000 XP and a G.E.C.K.
Work your way upwards (through a sh#tload of Super Mutants) to the Test Labs. Speak to the imprisoned Super Mutant named Fawkes via the intercom
on the outside of his cell. Agree to rescue him by going to the room at the end of the hall and activating the fire alarm. In return, he promises
to retrieve the G.E.C.K. for you. It's located in a room that is so irradiated that you would most likely not survive going in there. Anyway, he
warns you that setting off the fire alarm will also unlock the cells of all the other dangerous crazies penned up there... but in reality there
are only two of them and you can wait until they beat each other nearly senseless before stepping in to finish the remaining one off.
Once you've freed Fawkes, just follow him while he beats up all the Super Mutants on his way to retrieve the G.E.C.K. Of course, you can pitch
in to make things go quicker ;-) Once Fawkes has delivered the G.E.C.K. to you, he decides to part ways and stay there while you make your exit.
But once you are close to leaving Vault 87 with your prized G.E.C.K... well, let's just say there's a bit of a surprise in store! See section
directly below.
As you awake, Colonel Autumn is interrogating you. Don't let on to him that you know anything useful. Then President Eden intervenes and orders
the colonel out of the room. The President also releases your restraints. First thing to do is retrieve your gear from the locker there. Note
that Dogmeeat is no longer with you, if you had the pooch tagging along :-( Anyway, see Quest 1 for instructions on how to proceed from here.
Quests
- 1. The American Dream: Meet President Eden in his office - 1100 XP.
You'll need to defeat three of the Enclave soldiers to make your escape from the cell. Then head left from your cell (shortly after that, the
President intervenes again and you are free to roam the corriders for a while) and you wind up at the door that leads to level 2. Go all the way
up the stairs there to level 2. Unfortunately, as soon as you arrive at level 2, Colonel Autumn comes over the intercom and contermands the
President's orders. You're now to be shot on sight :- I would use a Stealth Boy here if you have one, to make it up to level 1. Go through the
War Room to get to the Control Room. The bots have been programmed by the President to kill the Enclave soldiers outside the Control Room. Then
go all the way to the top of the tower in the Control Room, and speak to President Eden, who is actually... a computer! He wants you to take a
vial of the Modified FEV Virus and insert it into the water purifier so that it will wipe out any mutants once they drink the water. Might as
well take it (hey, you don't *have* to use it just because you accepted it :-), as the President then makes your exit from the Enclave facility
very easy by turning all the automated defenses against the Enclave soldiers. Optionally, with very high Science skill, you can talk the
President into self-destructing and taking the Raven Rock facility down with him (though you don't seem to get any XP for accomplishing this, nor
does it have any effect on the endgame). Anyway, if you rescued Fawkes, he meets you at the exit. Might as well have him join you as he's very
handy in a fight. Then travel back to the Brotherhood of Steel Citadel and speak to Elder Lyons to complete this quest. See below.
Speak with Elder Lyons at the bottom of the Lab. This completes Enclave, Raven Rock Quest 1. You now have the game's final quest below.
Quests
- 1. Take it Back!: Activate Project Purity! - Endgame.
Well, they're going to activate this huge bot, as soon as you give the say so. Follow the bot (Liberty Prime) and the Lyon's Pride to the
Jefferson Memorial/Project Purity. Easiest to enter via the Gift Shop door, then take out the Enclave soldiers. Enter the Rotunda, have a
showdown with Colonel Autumn, and then you are faced with a moral dilemma to end the game. Oddly enough, if Fawkes is still with you he will
not enter the irradiated room on your behalf... oh, and if you haven't figured it out already, the code is: 2-1-6 (from the Revelations 21:6
poster, your Mom's favourite quote, that you found in your father's quarters there).
See the metzomagic.com Review of Fallout 3.
Copyright © Steve Metzler 2009.
All rights reserved.
|